
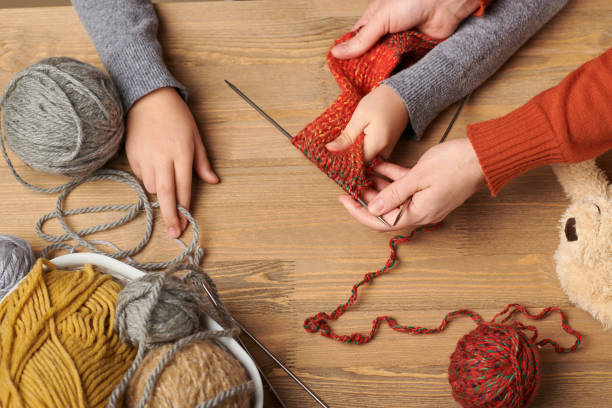
Knitting is a wonderfully relaxing and rewarding hobby that allows you to create beautiful, cozy accessories like scarves. Whether you’re looking to make a handmade gift or treat yourself to a new winter wardrobe piece, learning to knit a scarf is a great place to start. In this comprehensive guide, we’ll walk you through all the essential steps and techniques you need to know as a beginner knitter to craft your very own stylish scarf.
By the end of this post, you’ll have gained the knowledge and confidence to cast on, knit, purl, and bind off your first scarf project. Not only will you end up with a warm and snuggly accessory, but you’ll also have learned a valuable new skill that can open the door to all sorts of knitting possibilities. Let’s get started!
Gathering the Necessary Supplies
Before you can begin knitting, you’ll need to gather the essential supplies. Here’s what you’ll need:
- Yarn: Choose a medium-weight, beginner-friendly yarn, such as worsted weight or Aran weight. Natural fibers like wool or alpaca are excellent choices, but you can also opt for synthetic yarns like acrylic. Avoid super bulky or very fine yarns as a beginner.
When selecting your yarn, consider the following factors:
- Fiber content: Natural fibers like wool, alpaca, and cotton are soft, warm, and breathable, while synthetic yarns like acrylic are often more affordable and machine-washable.
- Yarn weight: Worsted weight or Aran weight yarns are ideal for beginners, as they’re easy to work with and create a sturdy, yet drapey fabric.
- Yardage: Make sure to choose a yarn with enough yardage to complete your scarf project, typically around 200-400 yards.
- Color: Select a color or variegated yarn that you find visually appealing and that will complement your wardrobe.
- Knitting needles: Select a pair of straight knitting needles in a size that corresponds to the weight of your chosen yarn. A good starting point is a size 8 (5mm) or 9 (5.5mm) needle.
The needle size you choose will depend on the yarn weight and the desired fabric density. As a general rule, the heavier the yarn, the larger the needle size. Refer to the yarn label for the recommended needle size.
- Scissors: A small, sharp pair of scissors will be handy for cutting your yarn.
- Tape measure: Keep a tape measure on hand to measure the length of your scarf as you knit.
- Stitch markers: (Optional) These small rings or pieces of contrasting yarn can help you keep track of your stitch patterns.
When choosing your yarn, pay attention to the label, which will indicate the weight, fiber content, and recommended needle size. Selecting the right combination of yarn and needles will ensure your knitting project turns out beautifully.
Knitting Basics for Beginners
Now that you have your supplies ready, let’s dive into the fundamental knitting techniques you’ll need to know to create a scarf.

Casting On
Casting on is the process of creating the first stitches on your needles to begin knitting. There are several methods to choose from, but the most common for beginners is the long-tail cast-on. Here’s how it’s done:
- Make a slip knot in your yarn and place it on your left needle.
- Hold the needle in your left hand and the yarn tail in your right hand.
- Wrap the yarn around your right thumb and index finger, creating a loop.
- Insert the right needle into the loop and pull a new loop through.
- Repeat step 4, drawing a new loop through the previous one, until you have the desired number of stitches.
The long-tail cast-on is versatile, creates a clean, stretchy edge, and is relatively easy to master as a beginner. Other popular cast-on methods include the cable cast-on, the knitted cast-on, and the thumb cast-on, each with its own unique properties and applications.
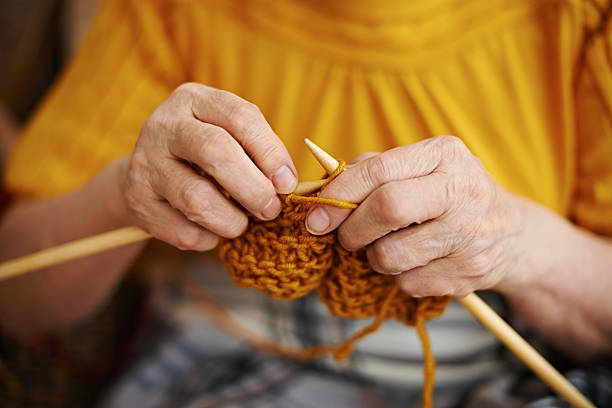
The Knit Stitch
The knit stitch is the foundational stitch in knitting and forms the basis of many patterns, including the classic garter stitch. To knit a stitch:
- Hold the needle with the stitches in your left hand and the empty needle in your right hand.
- Insert the right needle into the first stitch on the left needle from front to back.
- Wrap the yarn around the right needle and pull it through the stitch on the left needle.
- Slip the original stitch off the left needle, leaving the new stitch on the right needle.
Mastering the knit stitch is crucial, as it’s used in the majority of knitting projects. Practice this simple technique until you can execute it smoothly and consistently.
The Purl Stitch
The purl stitch is the reverse of the knit stitch and creates a bumpy, textured fabric on the opposite side of your work. To purl a stitch:
- Hold the needle with the stitches in your left hand and the empty needle in your right hand.
- Insert the right needle into the first stitch on the left needle from back to front.
- Wrap the yarn around the right needle and pull it through the stitch on the left needle.
- Slip the original stitch off the left needle, leaving the new stitch on the right needle.
Learning to purl takes a bit more coordination than knitting, but with practice, it will become just as natural. Being able to switch between knit and purl stitches is essential for creating more complex stitch patterns.
Binding Off
Binding off is the process of finishing your knitting project by securing the last row of stitches so they don’t unravel. Here’s how to do it:
- Knit the first two stitches on your needle.
- Using the left needle, lift the first stitch over the second stitch and off the right needle.
- Knit the next stitch on the right needle.
- Repeat step 2, lifting the first stitch over the second, until you have one stitch remaining on the right needle.
- Cut the yarn, leaving a 6-inch tail, and pull the tail through the final stitch to secure it.
Binding off neatly and securely is an important final step to ensure your scarf doesn’t come undone. Take your time and follow the steps carefully to achieve a professional-looking finish.
Practice these basic knitting techniques until you feel comfortable and confident executing them. Mastering the cast-on, knit stitch, purl stitch, and bind-off will lay a strong foundation for your scarf-knitting journey.
Choosing a Scarf Pattern
With your knitting skills honed, it’s time to select a scarf pattern that suits your style and skill level. As a beginner, you’ll want to choose a relatively simple pattern that allows you to focus on the fundamentals. Here are some excellent options to consider:
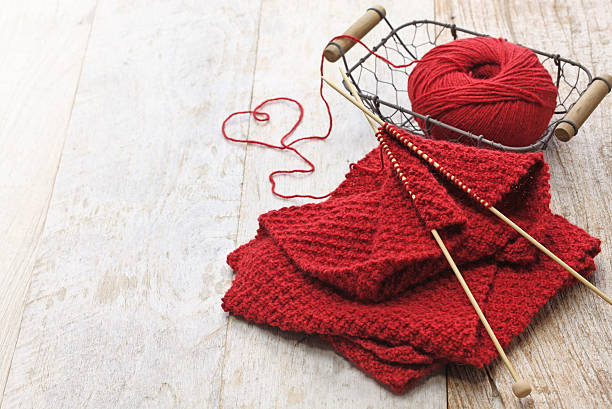
Garter Stitch Scarf
The garter stitch is the easiest and most straightforward scarf pattern for beginners. It’s created entirely by knitting every row, resulting in a soft, reversible fabric with a subtle ribbed texture. Garter stitch scarves are perfect for practicing your knit stitch and building confidence.
The benefits of a garter stitch scarf include:
- Simplicity: Knitting every row means you don’t have to worry about complex stitch patterns or alternating between knit and purl.
- Reversibility: The front and back of a garter stitch scarf look the same, so there’s no need to worry about keeping track of the “right” side.
- Versatility: Garter stitch scarves work well with a variety of yarn types and can be easily customized in length and width.
Stockinette Stitch Scarf
Stockinette stitch, achieved by alternating rows of knit and purl stitches, creates a smooth, even fabric with a classic look. While slightly more advanced than garter stitch, a stockinette scarf is still an excellent choice for new knitters, as it allows you to practice both knit and purl techniques.
Some key features of a stockinette stitch scarf include:
- Smooth texture: The alternating knit and purl rows result in a sleek, uniform fabric on the right side.
- Curl control: Stockinette stitch has a tendency to curl at the edges, so you’ll need to learn techniques like adding a garter stitch border to keep it flat.
- Intermediate skill level: Switching between knit and purl stitches requires a bit more coordination than the garter stitch.
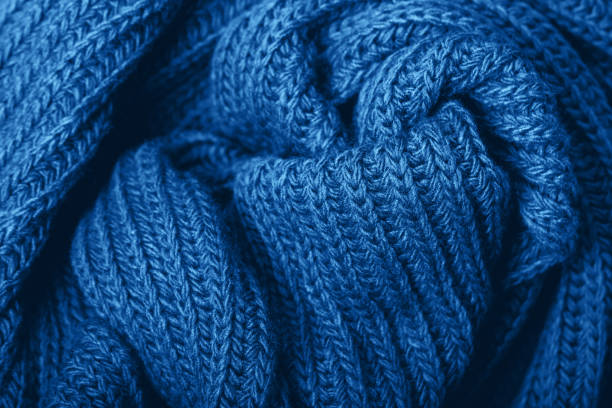
Ribbed Scarf
A ribbed scarf pattern, featuring alternating columns of knit and purl stitches, adds visual interest and a cozy, stretchy texture to your project. Ribbing is a great way to practice switching between knit and purl stitches while creating a stylish finished product.
Advantages of a ribbed scarf include:
- Stretchiness: The alternating knit and purl stitches give the fabric natural elasticity, making it comfortable to wear.
- Textural interest: The ribbed pattern adds visual depth and a unique, dimensional look to your scarf.
- Skill-building: Mastering the rhythm of the knit and purl stitches in a ribbed pattern will significantly improve your knitting technique.
When selecting your pattern, consider factors like the yarn weight, your personal style preferences, and the level of challenge you’re comfortable with as a beginner knitter. Don’t be afraid to start with a simple garter stitch scarf and work your way up to more complex patterns as your skills improve.
Step-by-Step Guide to Knitting a Scarf
Now that you have all the necessary supplies and have chosen your scarf pattern, let’s walk through the step-by-step process of knitting your first scarf.

Casting On
Begin by using the long-tail cast-on method to create the foundation stitches for your scarf. Determine the desired width of your scarf and cast on the appropriate number of stitches, typically between 20-40 stitches for a standard adult-sized scarf.
To ensure an even cast-on, try the following tips:
- Estimate the length of yarn you’ll need for the cast-on by wrapping the yarn around your needle 1-2 times and measuring the resulting tail.
- Keep the tension in your cast-on stitches consistent, neither too tight nor too loose.
- Use a slightly larger needle size for the cast-on to create a more elastic edge.
- Count your stitches carefully as you go to ensure you have the correct number.
Establishing the Stitch Pattern
Once your stitches are cast on, it’s time to begin knitting. If you’ve chosen a garter stitch pattern, simply knit every row. For a stockinette stitch scarf, knit the first row, then purl the second row, repeating this pattern. For a ribbed scarf, alternate between knit and purl stitches across each row.
As you work through the pattern, remember to:
- Maintain consistent tension in your stitches to prevent uneven fabric.
- Count your stitches at the end of each row to ensure you haven’t gained or lost any.
- Use stitch markers to help you keep track of pattern repeats, especially in more complex designs.
- Consult your pattern instructions or tutorial videos if you get stuck on a particular stitch or technique.
Knitting Rows
Continue knitting your chosen stitch pattern, maintaining an even tension throughout. Be mindful of your stitch count and keep your work straight and aligned. If you need to increase or decrease stitches, do so at the beginning or end of a row.
Here are some tips for smooth, consistent rowing:
- Develop a comfortable, efficient knitting rhythm by practicing the motions.
- Avoid pulling or tugging on the yarn, which can distort your stitches.
- Keep your work flat and neatly aligned on the needles as you knit.
- Use a stitch marker or safety pin to mark the beginning of each row.
- If you notice a mistake, don’t be afraid to rip back and re-knit the row.
Binding Off
As you near the desired length of your scarf, it’s time to bind off your stitches. Follow the steps outlined in the “Knitting Basics” section to securely finish your project.
Remember, the key to successful scarf knitting is practice, patience, and attention to detail. If you encounter any issues, such as dropped stitches or uneven edges, don’t get discouraged. Refer back to the basic techniques, and use stitch markers or a lifeline to help you stay on track.
Finishing and Caring for Your Handmade Scarf
Congratulations! You’ve completed your very first knitted scarf. Now it’s time to put the finishing touches on your creation and learn how to properly care for it.
Weaving in Ends
After binding off, use a tapestry needle to weave in the loose ends of your yarn, securing them on the wrong side of your work. This will prevent unraveling and give your scarf a polished, professional appearance.
To weave in ends effectively:
- Thread the tapestry needle with the yarn tail.
- Carefully insert the needle under 2-3 stitches on the wrong side of your work, going in the direction of the row.
- Pull the yarn tail through, leaving a small loop.
- Repeat step 3, weaving the tail through the stitches for about 1-2 inches.
- Trim the remaining yarn, leaving a short tail.
Blocking (Optional)
Blocking is a technique used to shape and smooth your knitted fabric. If your scarf has any unevenness or curling, you can lightly steam or wet block it to help it lay flat and even. Follow the blocking instructions specific to the yarn you used.
The basic steps for blocking a scarf:
- Wash the scarf in cool water, gently squeezing out excess moisture.
- Lay the scarf flat on a blocking board or towel-covered surface.
- Gently stretch and pin the scarf to the desired shape and dimensions.
- Allow the scarf to fully dry, then remove the pins.
Blocking can make a significant difference in the appearance and drape of your finished scarf, so consider taking the time to do it, especially for more complex patterns.
Caring for Your Scarf
Proper care and maintenance will help your handmade scarf last for years to come. Always refer to the care instructions on your yarn label. In general, you can hand wash your scarf in cool water and lay it flat to air dry. Avoid using the dryer, as the heat can damage the fibers.
Here are some additional tips for caring for your knitted scarf:
- Store your scarf in a cool, dry place when not in use to prevent damage from heat, moisture, or pests.
- Consider using a fabric shaver or lint brush to remove any pilling that may occur over time.
- If your scarf becomes dirty, spot clean it with a mild detergent rather than washing the entire piece.
- Avoid exposing your scarf to direct sunlight for extended periods, as this can cause the colors to fade.
Personalization
Finally, consider adding a personal touch to your scarf, such as fringe, tassels, or decorative buttons. These embellishments can transform a simple scarf into a unique, one-of-a-kind accessory.
To add fringe:
- Cut several strands of yarn, each about 6-8 inches long.
- Fold the strands in half and use a crochet hook or tapestry needle to pull the fold through the edge of the scarf.
- Pull the loose ends through the fold to secure the fringe.
- Trim the fringe to your desired length.
Tassels and buttons can be added in a similar fashion, allowing you to truly make your scarf your own.
Wear your new handknit scarf with pride, knowing that you’ve created a cozy, fashionable item that will keep you warm all season long. And don’t forget to share your accomplishment with friends and family – they’ll be impressed by your newfound knitting skills!
Troubleshooting Common Knitting Issues
Even the most experienced knitters can encounter challenges along the way. Here are some common issues you may face as a beginner and how to address them:
Dropped Stitches
If you accidentally drop a stitch, don’t panic! You can easily fix it by carefully working the stitch back onto the needle. Use a crochet hook or tapestry needle to gently pick up the dropped stitch, then place it back on the needle, making sure to maintain the correct orientation.
Uneven Edges
Keeping your edges straight and even can be tricky, especially when you’re first starting out. To help prevent uneven edges, make sure to knit the first and last stitches of each row firmly. You can also try adding a selvage stitch (knitting the first and last stitches of each row) to create a clean, stable border.
Frequently Asked Questions
Q: How long does it take to knit a scarf as a beginner?
A: The time it takes to knit a scarf as a beginner can vary depending on several factors, such as your knitting speed, the complexity of the pattern, and the size of the scarf. Generally, a simple garter stitch or stockinette stitch scarf can take a beginner knitter anywhere from 10-20 hours to complete. As you gain more experience, your knitting speed will increase, and you’ll be able to finish a scarf more quickly.
Q: Can I use any type of yarn for a beginner scarf?
A: While you can technically use any type of yarn for a beginner scarf, it’s best to start with a medium-weight, smooth yarn, such as worsted weight or Aran weight. These yarn weights are easier to work with, and the smooth texture makes it easier to see and manage your stitches. Avoid extremely fine or super bulky yarns, as they can be more challenging for a beginner. As you become more comfortable, you can experiment with different yarn types and weights.
Q: What if I make a mistake while knitting my scarf?
A: Mistakes are a natural part of the learning process, and it’s important not to get discouraged. If you notice a mistake, such as a dropped stitch or an incorrect stitch pattern, don’t panic. Carefully examine your work to identify the issue, and then use the techniques you’ve learned, like using a crochet hook to pick up a dropped stitch, to fix the problem. If the mistake is significant, you may need to rip back a few rows, but this is a common practice in knitting and won’t ruin your project.
Q: Can I add embellishments to my handmade scarf?
A: Absolutely! One of the joys of knitting is the ability to personalize your projects. After completing the basic scarf, consider adding fun embellishments like fringe, tassels, buttons, or even appliqués. These extra touches can transform a simple scarf into a unique, one-of-a-kind accessory. Just be sure to choose embellishments that complement the style and yarn you’ve used in your scarf.
Q: How do I know when my scarf is the right length?
A: The ideal length for a scarf is largely a matter of personal preference. As a general guideline, most standard adult-sized scarves range from 50 to 72 inches long. However, you can make your scarf as long or as short as you’d like. A good way to determine the right length is to periodically measure your work as you’re knitting and stop when it reaches your desired length. Remember, you can always add or remove a few rows to adjust the final size.
Conclusion
Knitting a scarf is a wonderfully rewarding beginner project that will teach you essential techniques and build your confidence as a new knitter. By following the step-by-step guidance provided in this comprehensive guide, you now have the knowledge and tools to cast on, knit, purl, and bind off your very own handmade scarf.
Remember to start with basic patterns, practice the fundamental stitches, and don’t be afraid to ask questions or seek out additional resources. With patience and persistence, you’ll be creating stylish, cozy scarves in no time. Happy knitting!
If you have any doubts or queries, feel free to write to us. It would be a great pleasure to help you out.