
Have you been dreaming of starting your own vegetable garden but feeling overwhelmed by where to start? Fear not! Growing food at home is an immensely satisfying experience, and this comprehensive guide will walk you through every step – from assessing your space to reaping your harvest.
The Joy of Growing Your Own Veggies – A Step-by-Step Plan
Have you been dreaming of starting your own vegetable garden but feeling overwhelmed by where to start? Fear not! This comprehensive guide will walk you through every step, from assessing your space to reaping your harvest. Growing food at home is not only immensely satisfying but provides a wealth of benefits.
Why You Should Start a Vegetable Garden
Growing your own produce allows you to:
- Enjoy Ultra-Fresh, Nutrient-Dense Veggies: Homegrown fruits and veggies are packed with vitamins, minerals, and antioxidants at their peak. Unlike grocery store produce that can travel thousands of miles, your harvest goes from garden to plate in mere minutes after picking.
- Save Money: A well-planned vegetable garden can yield an abundance of organic crops for just the cost of seeds, soil amendments, and a little sweat equity. Over time, your initial investment pays off exponentially through reduced grocery bills.
- Garden Cost Savings Example: Let’s say you spend $50 on seeds, tools, soil amendments, and supplies to start a 10×10 ft garden bed. If you grow tomatoes, peppers, zucchini, lettuce, beans, and carrots, that upfront $50 could yield over $600 worth of organic produce!
- Reduce Your Environmental Impact: Cut down on the emissions from transporting goods by eating locally. You’ll also curb plastic waste from packaging. Gardening promotes biodiversity by providing habitat for pollinators while reducing reliance on pesticides.
- Exercise and Destress: Tending to your garden provides a relaxing outdoor activity and light physical activity to counterbalance sedentary lifestyles. Digging, weeding, and harvesting burns calories while reducing stress and anxiety.“There is something infinitely healing in the repeated refrains of nature—the assurance that dawn comes after night, and spring after winter.” – Rachel Carson
- Know Exactly What You’re Eating: No more questioning how your produce was grown—you control exactly what nutrients go into cultivating your crops, foregoing synthetic fertilizers, pesticides, and other concerning additives.
Planning Your Dream Vegetable Garden
With so many benefits, you’re probably eager to start digging! But before you break ground, it’s wise to map out your future garden paradise. Key considerations include:
Location and Garden Size The first step is determining where and how much space you can dedicate to growing veggies. The ideal spot receives at least 6-8 hours of direct sunlight per day. Start small with a simple 4×8 foot raised bed or go for a larger 10×20 ft plot if you have the room.
Container gardening is another great option for limited spaces, especially patios, rooftops or balconies. Use large 24-inch pots or clever vertical planters. Just be sure to choose a heat-trapping dark plastic or ceramic container.
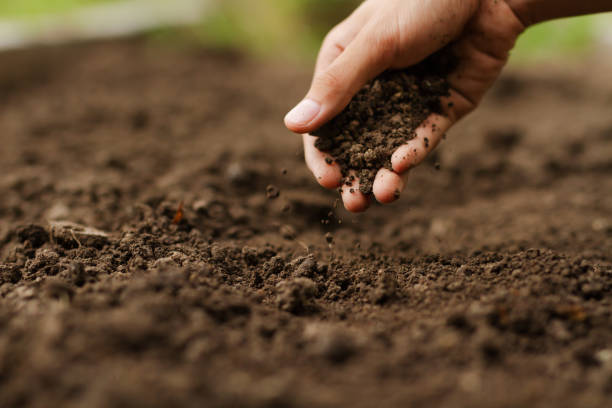
Soil Quality
Get your soil tested to understand its pH level and nutrient composition. Most crops thrive in slightly acidic soil around 6.5 pH. The results will indicate any amendments needed, like:
- Aged manure or compost to improve fertility and drainage
- Powdered limestone to raise pH in acidic soil
- Peat moss to increase acidity in alkaline soil
Good drainage is also crucial to prevent diseases and create an optimal root environment.
Climate and Crop Selection Research the climate factors like temperature, rainfall, humidity, and number of sunny days in your region. This will determine which plants grow best and help pick varieties suited for your local seasons and weather patterns.
For example, in hot desert climates look for heat-tolerant crops. Places with cooler summers are better for cold-hardy greens and root veggies. Don’t forget to map out successive planting times to extend your harvests.
Garden Layout Sketch out a plan detailing where each crop will go, allowing proper spacing and incorporating companion planting principles. Group crops based on their:
- Required sunlight exposure
- Compatible water and nutrient needs
- Spacing requirements as they mature
- Potential to attract or repel pests from neighbors
For example, separate thirsty crops like tomatoes and squash from drought-tolerant plants like beans and peppers. Put climbing crops like pole beans on one side so they don’t shade shorter plants.
Beginner-Friendly Vegetable Picks
Some fool-proof options for new gardeners include:
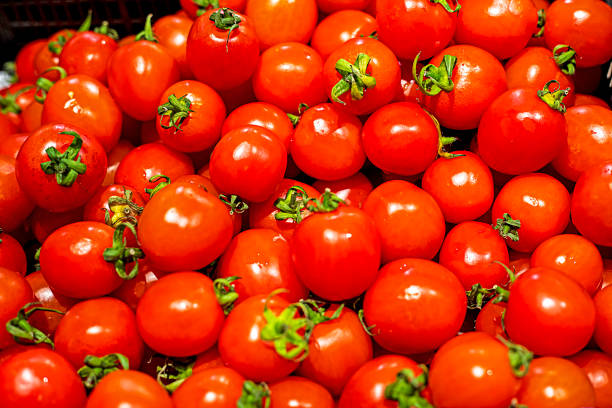
- Tomatoes: These iconic garden treasures come in hundreds of varieties for delicious snacking, salads, sauces and more. Bush types like Better Boy work best for beginners.
- Green Beans: Nutrient-rich green beans are simple to grow from seed and produce abundantly. Bush or pole bean varieties both work well.
- Zucchini: With just one or two zucchini plants, you’ll be inundated with this prolific summer squash! Perfect for breads, grilling, and more.
- Peppers: From sweet bells to spicy jalapeños, peppers offer bountiful yields. Start with compact varieties like Yolo Wonder for your first crop.
- Radishes: With their rapid growth, crispy radishes are one of the quickest crops for impatient gardeners to harvest some results! And they’re easy from seed.
- Leaf Lettuce: Cut-and-come-again lettuce varieties provide a continuous supply of fresh salad greens in as little as 30 days after sprouting.
- Carrots: These root veggies may surprise you with their simplicity. Just ensure loose, rock-free soil for the roots to develop properly.
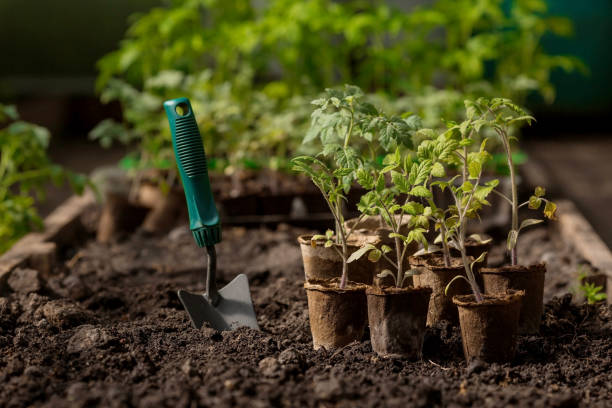
Setting up Your First Garden Bed
With your plan in place, it’s time to get your hands dirty! Follow these steps to establish your first veggie patch from grass:
- Remove Existing Sod: Use a sod cutter or sharp spade to strip away any grass covering your planned plot. You’ll want to remove as many roots as possible.
- Till Deeply: Once the surface is clear, loosen the top 8-12 inches of soil using a tiller or turn the soil by hand with a sturdy garden fork. This breaks up compaction and creates a well-aerated base for roots to spread.
- Amend the Soil: Based on your soil test, mix in any recommended amendments like aged manure, compost, peat moss, fertilizer or garden lime. Break up clumps and sticks as you go.
- Build Raised Beds (Optional): If drainage is poor, construct raised beds 6-18 inches tall using untreated wood, stone, bricks or another sturdy material. Fill with a mixture of topsoil and compost.
- Install Irrigation: Lay soaker hoses, drip emitters, or build a simple sprinkler system to efficiently keep your plants evenly hydrated. This prevents inconsistent watering.
- Map Your Layout: Use twine, stakes or furrows to mark out crop rows, paths, trellises, and other structures based on your meticulously planned garden blueprint.
Essential Gardening Tools for Beginners
As you gear up, stock your tool shed with these basic supplies:
- Gardening Gloves: Protect your hands from dirt, blisters, thorns and grime. Look for breathable nitrile gloves that allow dexterity.
- Hand Trowel: This small hand tool works great for digging holes for planting individual seeds, seedlings or bulbs. A durable aluminum trowel is rust-resistant.
- Pruning Shears: Invest in a quality pair to snip off spent blooms, deadhead, harvest vegetables and more. Look for non-stick coating and ergonomic grips.
- Hoe or Cultivator: These tools help you maintain weed-free beds. A sturdy swan-neck hoe for push-pulling or a prong cultivator works best.
- Garden Rake: A lightweight, resilient leaf rake with a short handle is perfect for clearing beds and gently leveling soil.
- Wheelbarrow or Garden Cart: Look for a rust-proof model to lug tools, supplies, soil and debris across your yard. The large capacity prevents excessive hauling.
Planting Day!

With your growing space prepped and tools ready, it’s finally time to get those plants in the ground! A few planting pointers:
- Pay Attention to Planting Dates: Sow seeds or transplant seedlings at the proper time based on your climate’s last spring frost date and crop requirements. Cool season crops like lettuce, spinach, peas and brassicas can go in 4-6 weeks before your last expected frost. Warm season edibles like tomatoes, peppers, squash and beans need toasty temps to thrive, so wait until a couple weeks after frost risk passes.
- Plant at the Right Depth: Read your seed packets carefully. The proper planting depth ensures seeds can easily germinate and seedlings establish robust root systems. In general, bury large seeds like beans 1 inch deep and tiny carrot or lettuce seeds just 1/4 inch under the soil.
- Space Accordingly: Provide each plant enough room to grow by following recommended spacing guidelines on seed packets or plant tags. This improves air flow and prevents overcrowding which can harbor disease and restrict growth. For example, space cabbage seedlings 12-24 inches apart but lettuce just 6 inches.
- Set Up Supports: Insert stakes, trellises, cages or teepees at planting time for vining crops like cucumbers, pole beans and indeterminate (sprawling) tomatoes. This prevents having to disturb delicate root systems later.
- Water Gently: Provide a deep watering immediately after planting seeds or seedlings by using a gentle shower setting on your hose or watering can. This settles soil without compacting it.
Strategic Crop Placements
For optimum growth and easy maintenance, keep these tips in mind as you arrange your plantings:
- Group Plants by Sunlight Needs: Full sun veggies like tomatoes, peppers, melons and beans get prime south or west facing spots. Part-shade tolerant plants like leafy greens, brassicas and root crops go on the shadier north side.
- Rotate Crop Families Year-to-Year: Avoid planting the same group like nightshades (tomatoes, peppers, eggplant) or brassicas (broccoli, kale, cauliflower) in the same spot annually. This prevents disease buildup and nutrient depletion in the soil.
- Companion Plant Allies: Certain plant pairings can be mutually beneficial. For example, plant herbs like basil with tomatoes to repel pests and improve growth and flavor. Marigolds deter nematodes for healthier tomato roots.
- Stagger Plantings for Continual Harvests: Sow vegetable seeds every 2 weeks rather than all at once. This staggers maturity dates so you don’t end up with all your lettuce or beans ready simultaneously. It provides a longer, more manageable harvest period.
Tips from an Expert Gardener
“One of my favorite tricks is using a planting map to organize my garden beds. I draw out where I’ll plant each type of vegetable and then rotate those crops to different areas each year. This prevents soil nutrient depletion and helps disrupt pest and disease cycles.”
- Karen Bennett, Master Gardener
Nurturing Your Growing Garden
Get ready to play plant parent! Stay on top of these garden-tending tasks:

Watering Pay close attention to soil moisture, aiming to keep it consistently damp but not soaked. Most veggies need about 1-2 inches of water weekly from rainfall or irrigation.
The best approach is using soaker hoses or drip irrigation to minimize disease by avoiding leaf wetness. Water in the early morning so any moisture on foliage has time to dry before nightfall.
Weeding and Mulching Weeds compete for the same light, water and nutrients as your crops, so diligent weed removal is essential, especially in spring and fall when weed seeds germinate most rapidly. Use a hoe or hand pull between rows and around plants weekly.
After weeding, apply a 2-4 inch layer of organic mulch like bark chips, straw or shredded leaves around plants. This smothers weeds and retains precious soil moisture. Replenish the mulch as it decomposes.
Fertilizing Most vegetables are heavy “feeders” that benefit from 1-2 fertilizer applications during the growing season. About 4-6 weeks after sprouting, scratch in a balanced vegetable fertilizer like a 10-10-10 or fish/seaweed emulsion around plants.
Provide a second application midway through the season, being sure to keep fertilizer off plant leaves and stems. For an organic approach, top dress crops with compost tea or manure tea instead.
Integrated Pest Management (IPM) Check plants regularly for pest insects like aphids, slugs or leaf-eating beetles. As soon as bugs appear, remove them by hand-picking, using insecticidal soaps, introducing beneficial insects like ladybugs or lacewings, or applying a last resort organic pesticide like neem oil or Bt.
Address disease issues promptly by removing any affected foliage, clearing debris, adjusting watering and increasing air flow between plants if needed. An ounce of prevention avoids having to take drastic pest control measures.
Trellising and Staking
Provide support as vining plants like cucumbers, beans, and indeterminate (sprawling) tomatoes grow by tying stems to stakes or guiding onto trellises, cages or tepees.
This improves air circulation and prevents fruits from touching the ground where they can rot. Stake top-heavy plants like peonies and use cages for bushy plants like peppers too.
Extending the Harvest
To keep the bounty rolling in all season, try techniques like:
- Succession Planting: Sow seeds of crop like lettuce, radishes and bush beans every 2-3 weeks for a continuous harvest instead of getting deluged all at once.
- Season Extension: Use strategies like cloches, cold frames or row covers to warm soil earlier in spring, allowing you to transplant heat-lovers like tomatoes, peppers and eggplants sooner. In fall, these protect tender crops from frost.
- Grow Heat-Lovers in Containers: Plants like tomatoes, peppers and eggplants do great in large containers you can move around to catch more or less sun as needed through the season.
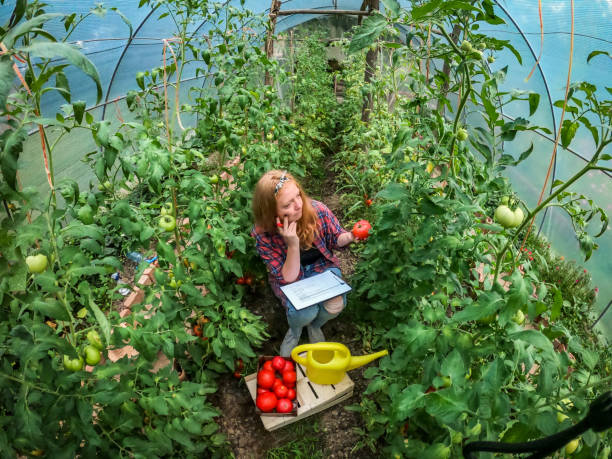
Savoring Your Homegrown Veggies
After all your hard work tending the crops, it’s time to enjoy the literal fruits of your labor! Here are tips for harvesting:
- Pick in Prime Time: Harvest veggies when they’re at peak maturity to capture the best flavors and nutrients. For example, pick tomatoes when they’ve turned fully red on the vine, shell peas while pods are still flat, and gather potatoes after plant tops have died back.
- Use the Twist and Pull Method: For produce like tomatoes, beans, eggplants and peppers, grasp firmly and gently twist and pull to remove from the plant without damaging it.
- Harvest Leaf Crops Continually: For leafy greens like lettuce, spinach, chard and kale, use scissors or pruning shears to snip off just the outer leaves, allowing the inner plant to keep producing new growth.
- Cure Onions, Garlic & Potatoes: These crop need curing time after harvesting to allow skins and flesh to properly dry and harden for better storage life. Spread out in a warm, dry, well-ventilated space for 2-4 weeks before storing.
- Pick at Peak Quality: Time your harvests for when crops are at their absolute prime condition. For example, snap peas are best when plump but still crisp and bright green, not bulging and yellow. Carrots are sweetest when shoulder pokes above soil line but before roots split.
Harvesting Pro-Tips
“Make harvesting a daily ritual during peak season to keep up with production and catch crops at their peak. I check my garden every morning while having my coffee and snip off any ripe beans, zucchini or greens.”
- Julia Saso, Farm Extension Agent
“Keep a harvest log each season noting things like first and last harvest dates for each crop. This will help you perfectly time plantings in future years.”
- Michael Brune, Horticulturist
Preserving the Bounty
With a productive veggie garden, you’ll likely have surplus crops to preserve for the months ahead. Try these simple, satisfying preservation techniques:
Canning and Pickling Home canning is an excellent way to bottle up tomatoes, salsas, jams and more for year-round enjoyment. The pickling process also works great for preserving cucumbers, peppers, beets, carrots and other veggies.
When canning, always follow USDA approved recipes and procedures exactly to prevent the growth of harmful bacteria that can cause botulism poisoning. Invest in a water bath or pressure canner, jars, lids, and other essential equipment.
Canning Example: Tomato Sauce
- Blanch and peel ripe tomatoes
- Simmer with garlic, onions, basil until thickened
- Pour hot sauce into sanitized canning jars, leaving 1/2 inch headspace
- Run a plastic knife around insides of jars to remove air bubbles
- Wipe rims and apply lids/rings
- Process in boiling water bath for 35 minutes
- Allow to cool – lids should be sucked down
- Remove rings and store sauce jars for up to 1 year!
Freezing
For longer term storage, freezing is one of the easiest preservation methods that retains flavor, texture and nutrients. Blanch produce like green beans, peas, broccoli, leafy greens and berries in boiling water for 2-3 minutes before plunging into an ice bath. This deactivates enzymes that cause deterioration.
Pat dry, package in air-tight containers or vacuum-sealed bags, and freeze at 0°F or below. Most frozen vegetables will keep for 8-12 months with minimal quality loss.
Dehydrating and Drying Invest in an electric dehydrator or use your oven on its lowest setting to create delicious homemade veggie chips, fruit leathers, dried tomatoes and even make your own dried herbs and spice mixes from your garden’s bounty.
Dehydrating concentrates natural sugars and flavors while removing all moisture, enabling safe storage at room temperature for 6 months to a year. To dry garden produce, first wash and slice ingredients about 1/4-inch thick. Then simply dehydrate at 125-135°F for up to 24 hours until leathery and brittle.
Cold Storage For hardier produce like cabbages, potatoes, onions, garlic, carrots, and beets, cold storage is an effective preservation method. Make sure crops are fully cured and inspect for any nicks or soft spots before storing.
The ideal storage conditions are cold (32-40°F), humid (90-95% relative humidity) and dark spaces like root cellars, basements or insulated garages. This environment slows respiration and delays sprouting for 4-7 months of quality preservation.
Smart Storage Tips
“Always use food-grade, air-tight containers for storage and remove as much air as possible before sealing. Also, I recommend vacuuming-sealing frozen foods to prevent freezer burn on delicate items.”
- Shelby Woods, Food Preservation Blogger
“When freezing garden veggies, don’t skip the blanching step! It deactivates the enzymes that cause nutrient loss, off-flavors, and discoloration over time.”
- Nathaniel Bryant, Agricultural Extension Agent
Frequently Asked Questions
Q: How much space do I need for a vegetable garden?
A: You can start small with just a 4×8 ft raised bed or some patio containers if space is very limited. For an in-ground garden, allocate a minimum of 200 sq ft to have plenty of variety. But be warned – vegetable gardening can become addictive and you may want to expand in future seasons!
Q: What if I have poor-quality soil?
A: Don’t worry – even subpar soil can be brought up to prime vegetable-growing condition. Amend it by mixing in hefty amounts of aged manure, compost, peat moss or coconut coir to improve drainage and add organic matter. You can also install raised beds and fill with a premium soil blend.
Q: What are truly low-maintenance crops for beginners?
A: Tried and true beginner crops include zucchini, tomatoes, green beans, radishes, carrots and salad greens. These tend to be prolific producers with minimal pest and disease issues if planted properly.
Q: How do I keep pests away organically?
A: Follow an integrated pest management (IPM) plan focused on prevention and monitoring. Rotate crops annually, use row covers, introduce beneficial insects like ladybugs, clear weeds and debris, and only apply organic deterrents like neem oil or Bt as a last resort.
Q: What do I do with all the extra produce?
A: Lucky you! Preserve that bounty through canning, freezing, dehydrating or cold storage. Donate extras to food pantries or friends and neighbors. You can also try pickling, fermenting or making jams and sauces. Some gardeners even sell at local farmer’s markets.
Conclusion
Starting a vegetable garden from scratch requires some upfront effort but is an immensely rewarding experience. By following the steps in this guide, you’ll be well on your way to enjoying a bountiful harvest of ultra-fresh, nutrient-dense produce while getting your hands dirty.
Don’t get discouraged if you run into challenges at first. Gardening is a lifelong learning process of fine-tuning your green thumb! Stick with it, and you’ll soon be savoring the unbeatable flavors of homegrown veggies.
With some soil, sunshine, water and TLC, an entire world of juicy tomatoes, crisp beans, sweet carrots and more will be yours to relish all season long from your own backyard vegetable patch. So grab your trowel and get planting!
If you have any doubts or queries, feel free to write to us. It would be a great pleasure to help you out.